

Introduction
Azure Data Factory (ADF) has become one of the go-to tools when it comes to handling data integration between products in the Azure stack. There are so many options when it comes to connecting resources inside and outside of Azure.
Microsoft Power Automate (previously Flow) allows you to easily connect Microsoft products, not just those in Azure, but a host of other third-party SaaS offerings. While great for most use-cases, more complex data integrations will require tools like ADF.
In this tutorial, we'll create our very first ADF pipeline that simply copies data from a REST API and stores the results in Azure Table Storage. We'll walk you through, step-by-step.
Note: You can click on any image to navigate the tutorial.
We break down the details into the following sections:
- Section 1: Create Azure Data Factory
- Section 2: Create Azure Data Factory Pipeline
- Section 3: Setup Source
- Section 4: Setup Sink (Target)
- Section 5: Setup Mappings
- Section 6: Validate, Publish & Test
- Section 7: Conclusion
Assumptions
We won't cover setting up Azure for the first time. This article assumes you have the following items setup prior to starting this tutorial.
- Azure Portal - you will need a Microsoft Azure account.
- Azure Storage - you will need a storage account configured.
- Azure Table Storage - you will need a table created called characters.
- REST API - we will be using the Star Wars API.
Section 1: Create Azure Data Factory
First things first. Let's start by creating our Azure Data Factory resource.
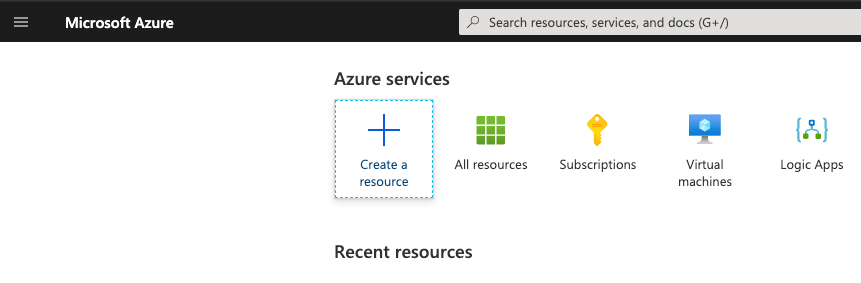
First step, log into the portal and click the Create a resource button.
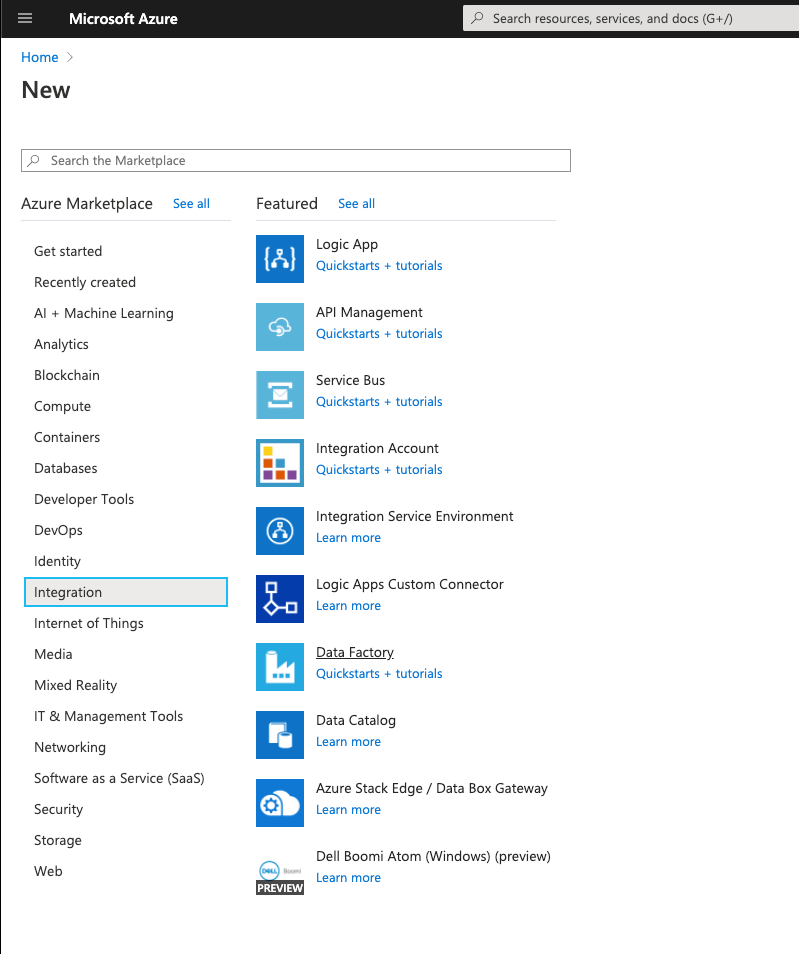
Next, select the Integration option and then click Data Factory.
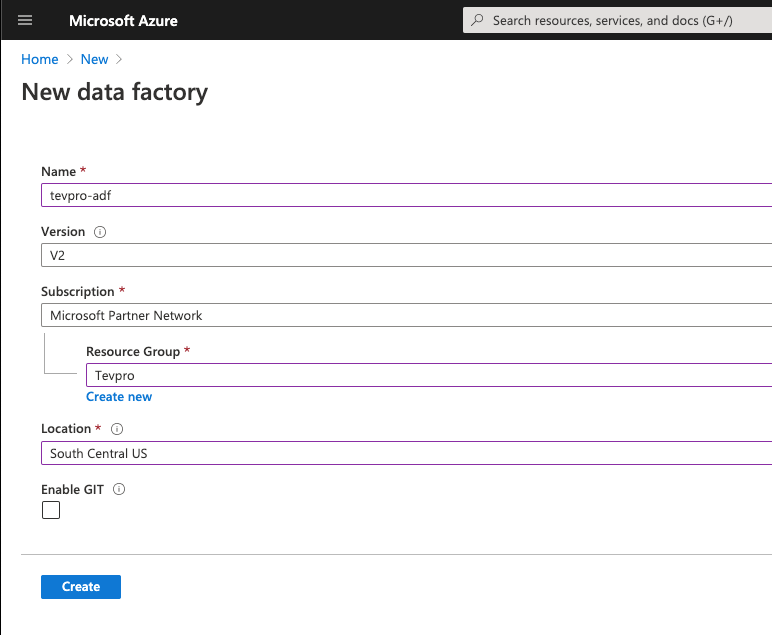
From here, we fill out the pertinent information. Name, Subscription, Resource Group and Location are all required fields (If you do not have a resource group setup, click the create new option prior to this step).
By default, the Enable GIT option is selected. For this tutorial, we're leaving the option unchecked. If you prefer saving everything you build in a repository, you can configure that option.
Click Create and let the magic happen.
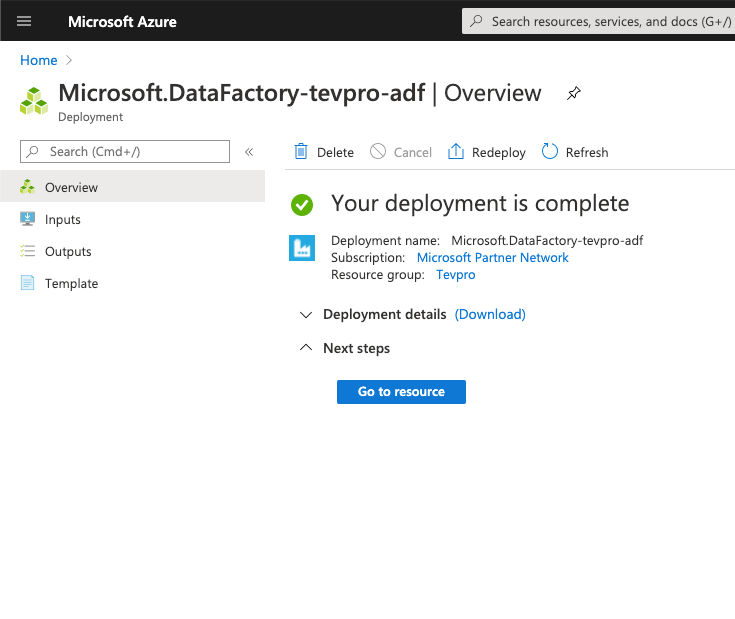
Next, you'll be redirected to the deployment screen that shows the progress of your Azure Data Factory resource being created.
After a minute or so, you should see Your deployment is complete.
Boom! You've finished the first step. Your Azure Data Factory resource setup is complete. From here, click the Go to resource button.
Section 2: Create Azure Data Factory Pipeline
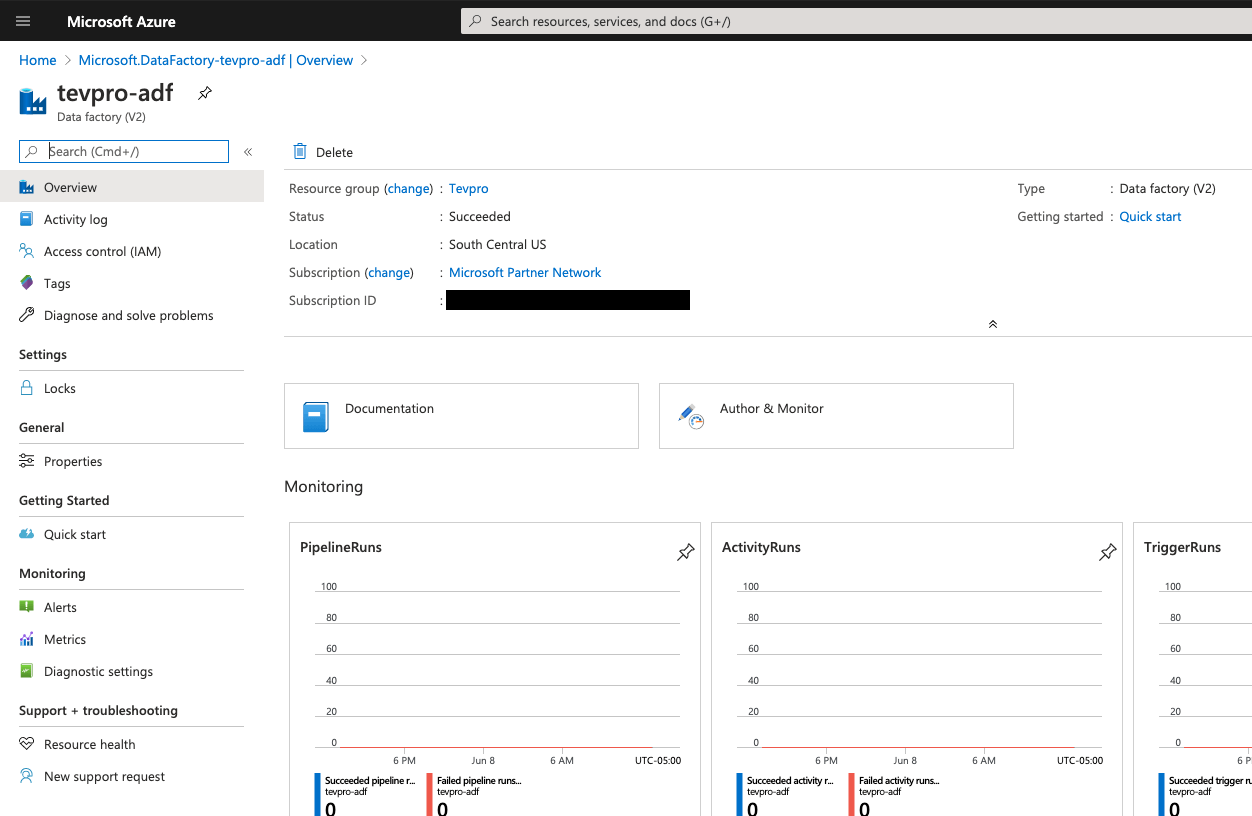
Now that we have our Azure Data Factory resource setup, you should see something that looks like the image below. This is the high level look at our resource. You can see metrics about the CPU, memory, and get a quick glance at how things are running.
In order to create our first Azure Data Factory (ADF) pipeline ,we need to click the Author & Monitor option.
From this point, we should see an entirely new browser window open and see that our data factory is ready for use. Here you have a few options. Today, we are going to focus on the first option; click Create pipeline.
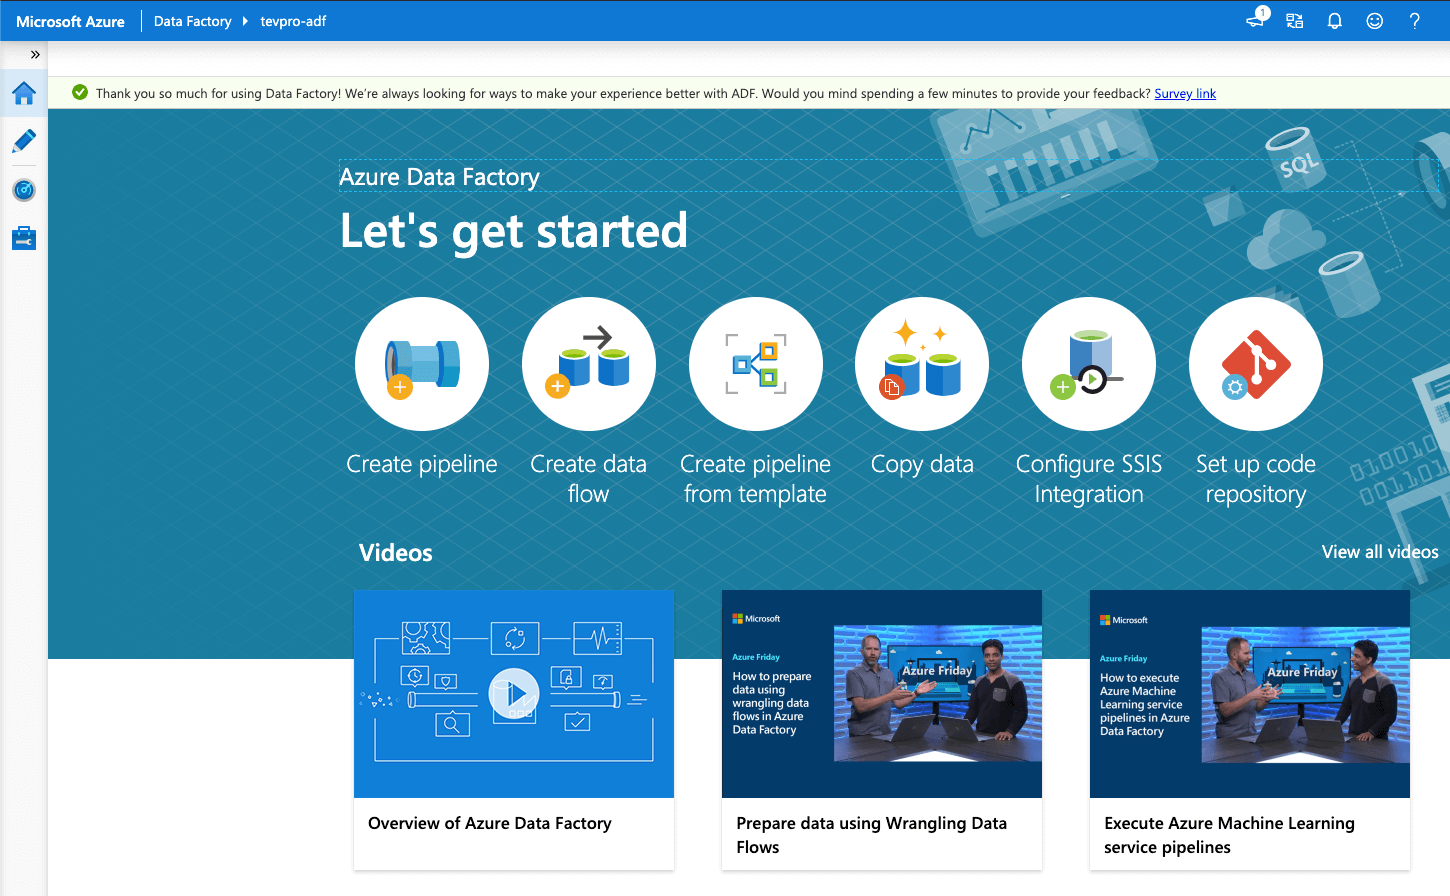
I know what you are thinking, Wowzers, that is a lot of options. But don't be discouraged. We will start with something simple that everyone has had to do at one point or another doing data integration.
First, let's rename our pipeline and call it first-pipeline.
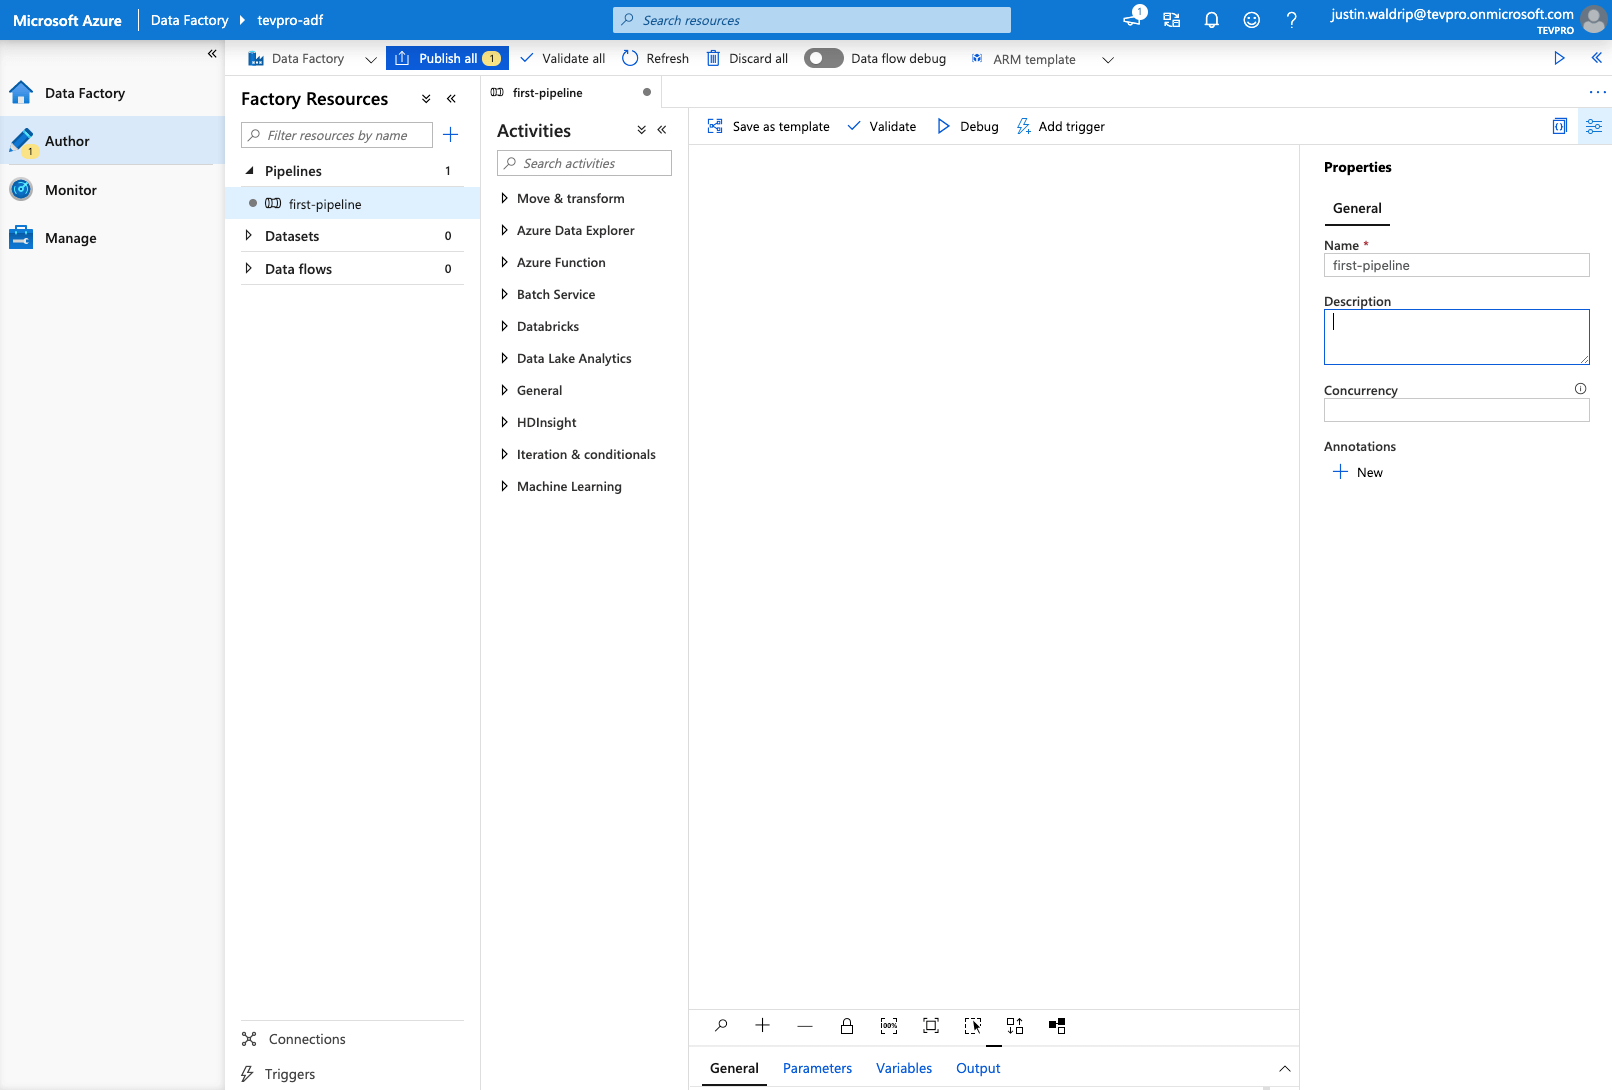
Next, expand the option under the Activities column labeled Move & transform. Now, drag the item labeled Copy data onto the middle section that is blank.
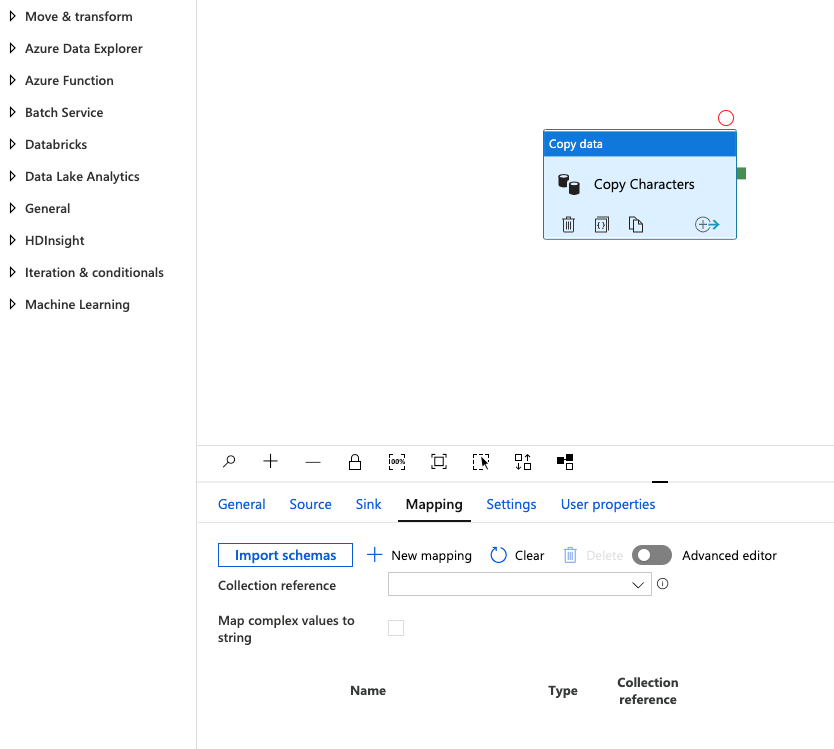
After doing this, we should see our Copy data activity show up and the options panel expand from the bottom of the screen. This is where we are going to configure the options for our copy data task.
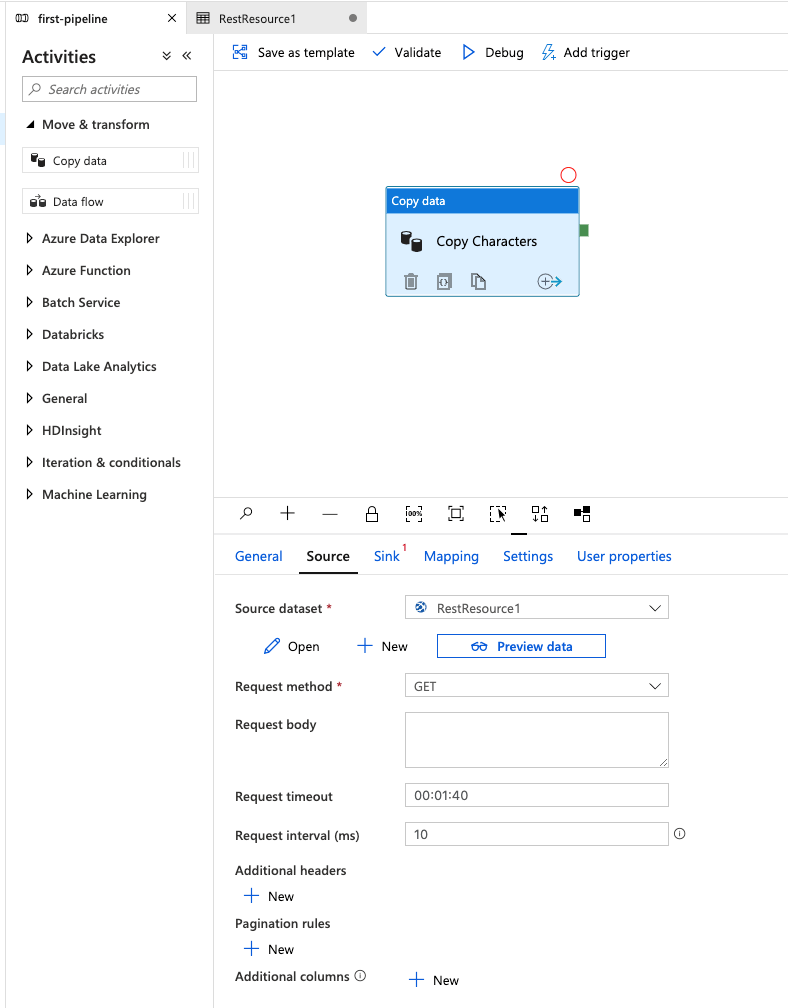
Go ahead and rename our task that is labeled Copy data1 to Copy Characters.
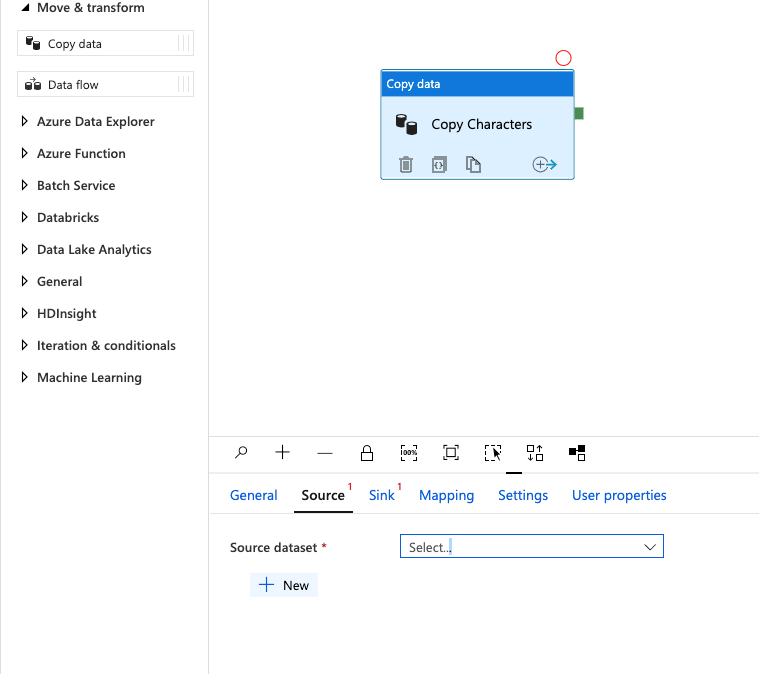
Section 3: Setup Source
To begin, click the tab labeled Source. Here, we will configure our API endpoint. Since we have not setup any source datasets, we won't see anything in the drop down.
Click the + New button.
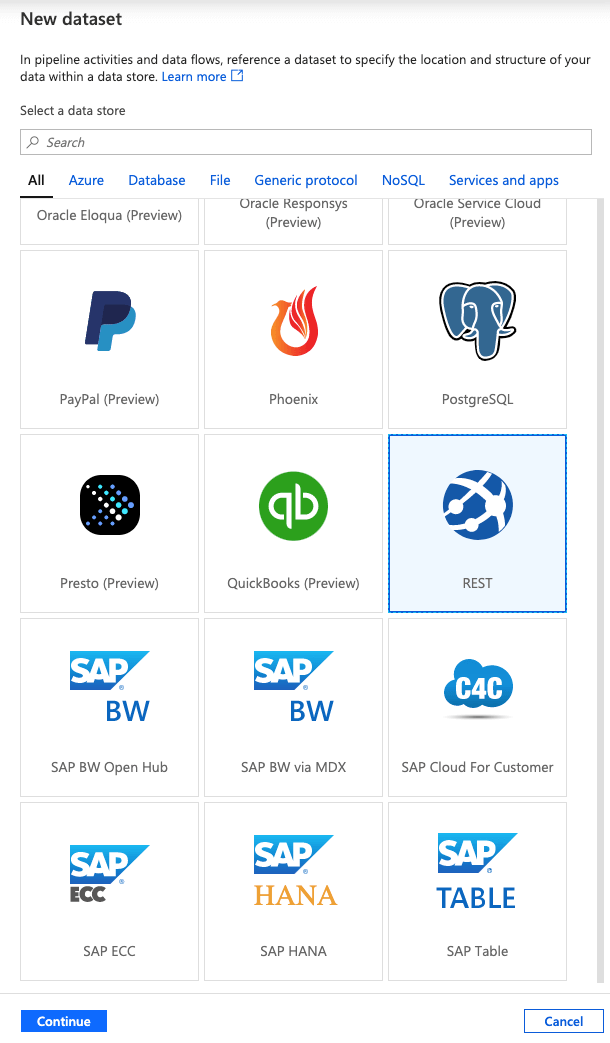
After the previous step, you should now see the New dataset panel show up on the right side. As you can see there are tons of options and more being added regularly.
Scroll down until you see the option for REST. Select it and click Continue.
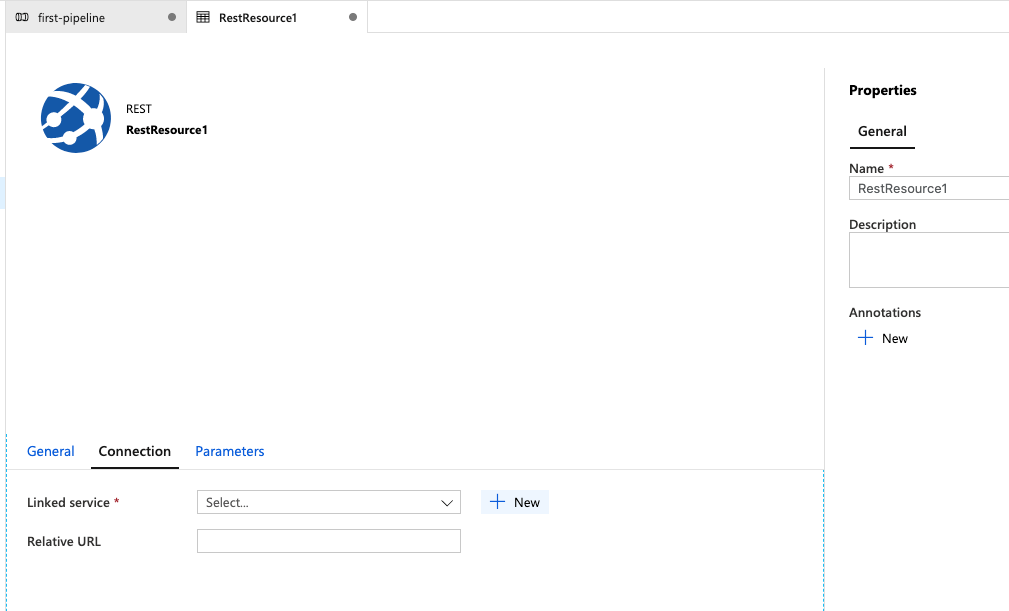
Now we should see our Source dataset is updated and labeled RestResource1. This screen allows you to configure some additional options around our new dataset.
To setup and configure our connection information for the dataset; click the Open button.

This will open up another overall tab next to our pipeline tab that allows us to configuration our REST API. At this point, you could rename your dataset to something more meaningful, but for now, we'll leave it as is.
Click the Connection tab. As you can see, we don't have a linked service setup.
Click the + New button.
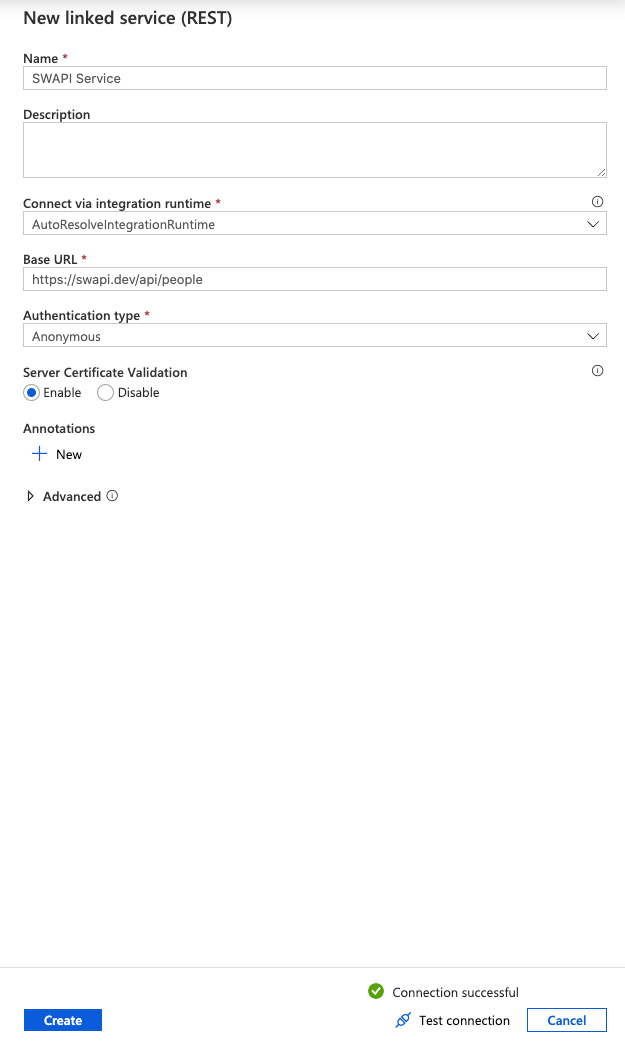
Notice the side panel which allows for setup of all the information we need to connect to our REST API. For this tutorial, we will use the Star Wars API aka SWAPI.
Let's name our service something useful like SWAPI Service. Then, we'll setup our Base URL and point it to our API which is: https://swapi.dev/api/people.
Since our API doesn't require any authentication, we select the type Anonymous.
Note: Best practice is to always provide some type of authentication.
Finally, click the Test connection button to ensure it is working and then click the Create button.
We should now see our RestResource1 tab is updated with our new connection information.
Now, let's go back to our pipeline, click the first tab labeled first-pipeline.

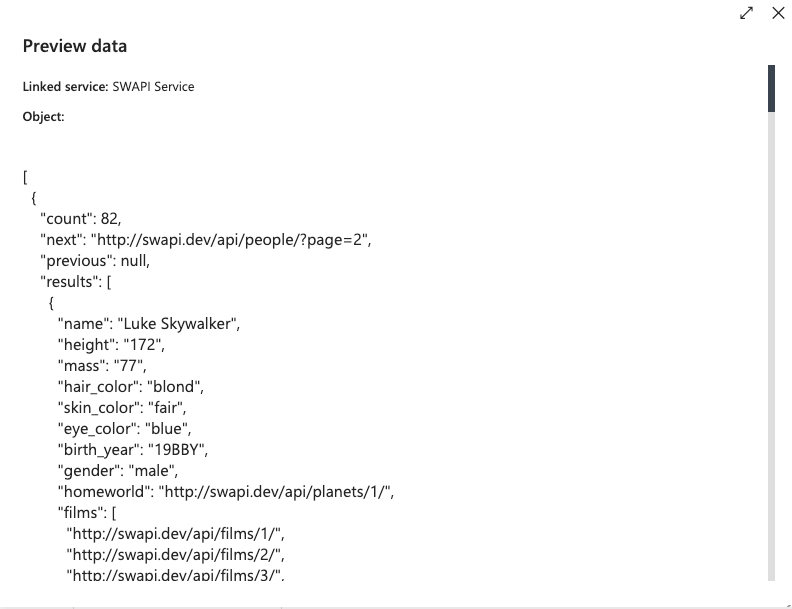
Now that we have setup and configured our source, we can preview what our data is going to look like.
Click Preview data.
You'll see a preview dialog popup that shows we have successfully connected to our API and what our JSON response will look like.
Close the dialog and let's move onto the next steps.
Section 4: Setup Sink (Target)
Now that we've completed the data source setup, we need to setup and configure where we're going to store the data. For this tutorial we assume you already have an Azure Storage resource setup and ready for use.
In ADF our target is called a Sink.
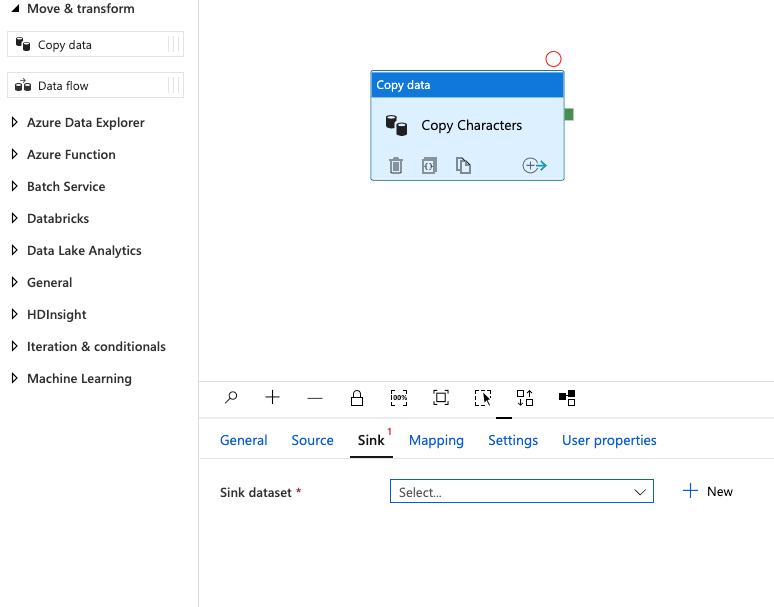
Click the tab labeled Sink, then Click the + New button.
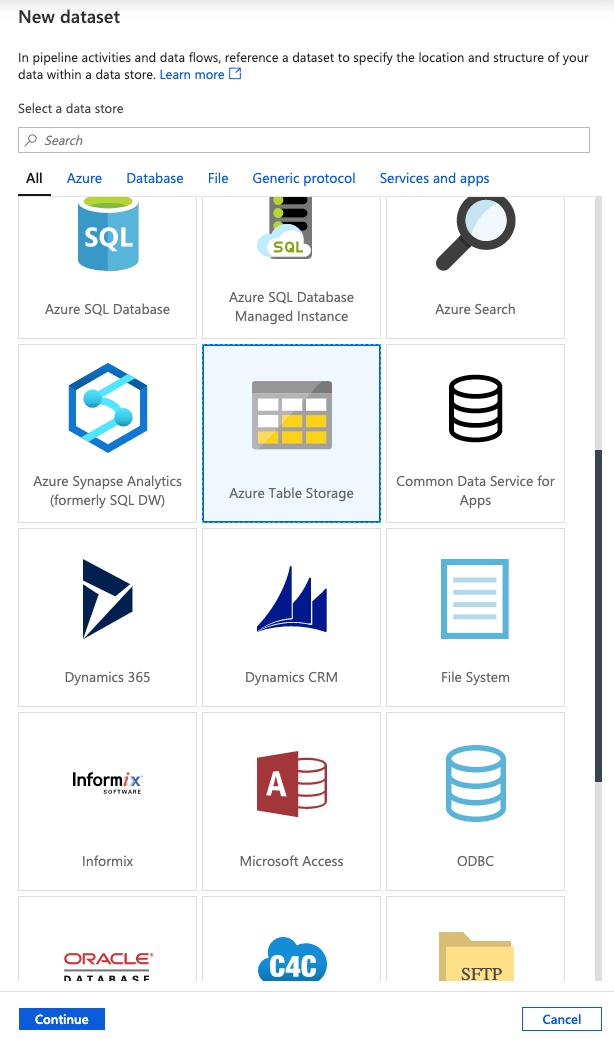
These next steps should look very familiar. We'll begin the process, just like before, but this time we'll configure where we want our data stored.
Scroll down until we see the option Azure Table Storage. Select it and click Continue.
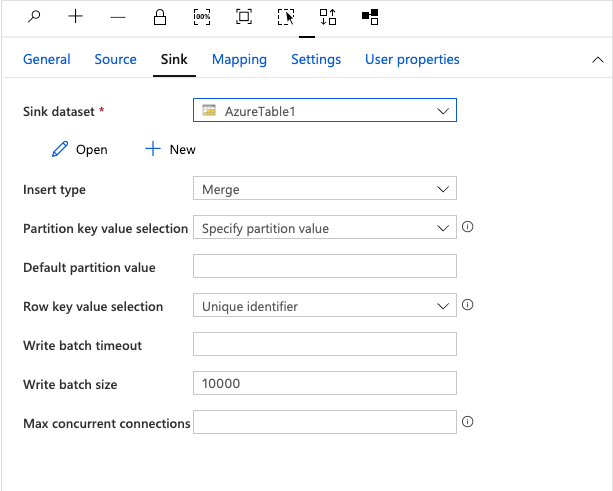
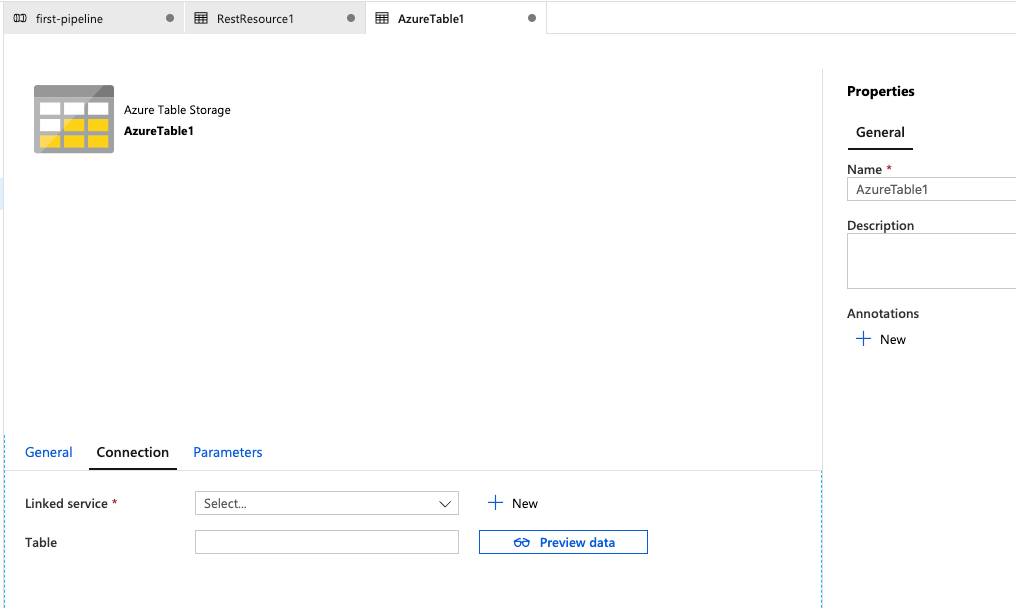
Now we should see that our Sink dataset is updated and labeled AzureTable1.
To setup and configure our table storage information, we need to click the Open button.
Once again, this will open up another tab and allow us to configure our Azure Table Storage connection information.
Click the Connection tab, then click the + New button.
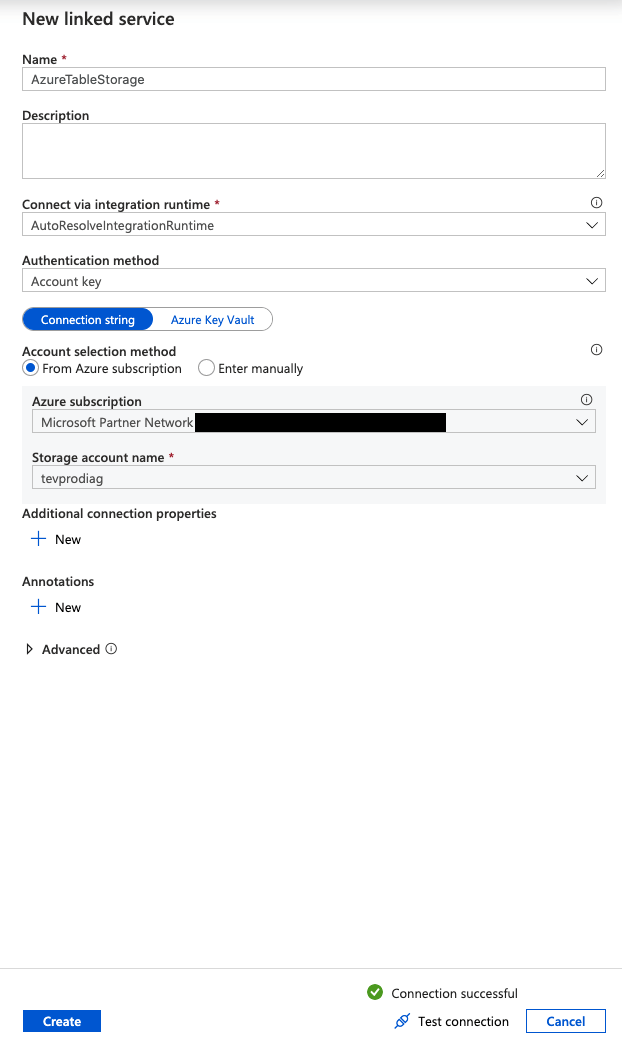
We should see another side panel that allows us to configure our table storage connection information.
Let's name our service AzureTableStorage.
Next, we select our Storage account name for use. If you didn't setup one previously, you'll need to do that first.
Finally, click the Test connection button to ensure it is working and then click the Create button.
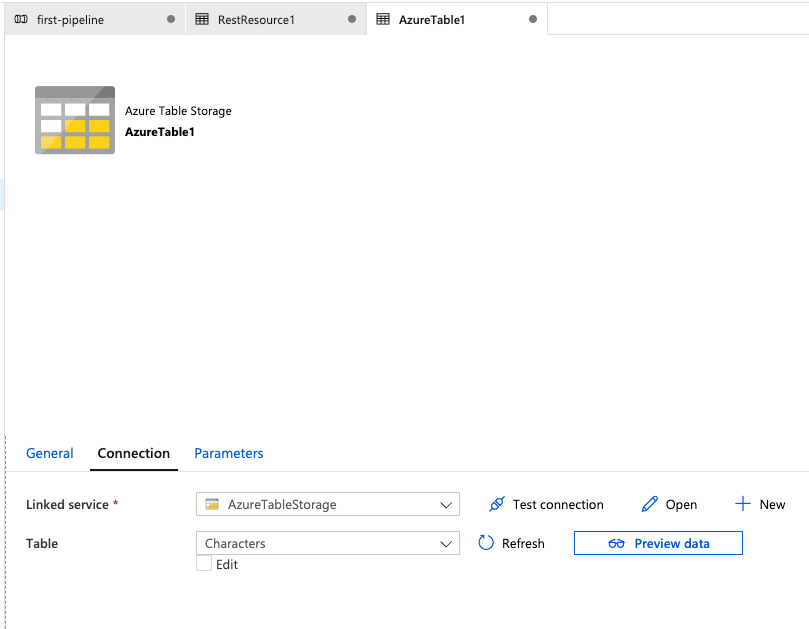
We should now see our AzureTable1 tab is updated with our new connection information.
Lastly, we select the table want to store our data in. Select the table named Characters (or whatever you named your table).
For the final part of this section, we'll go back to our pipeline. Click the first tab labeled first-pipeline.
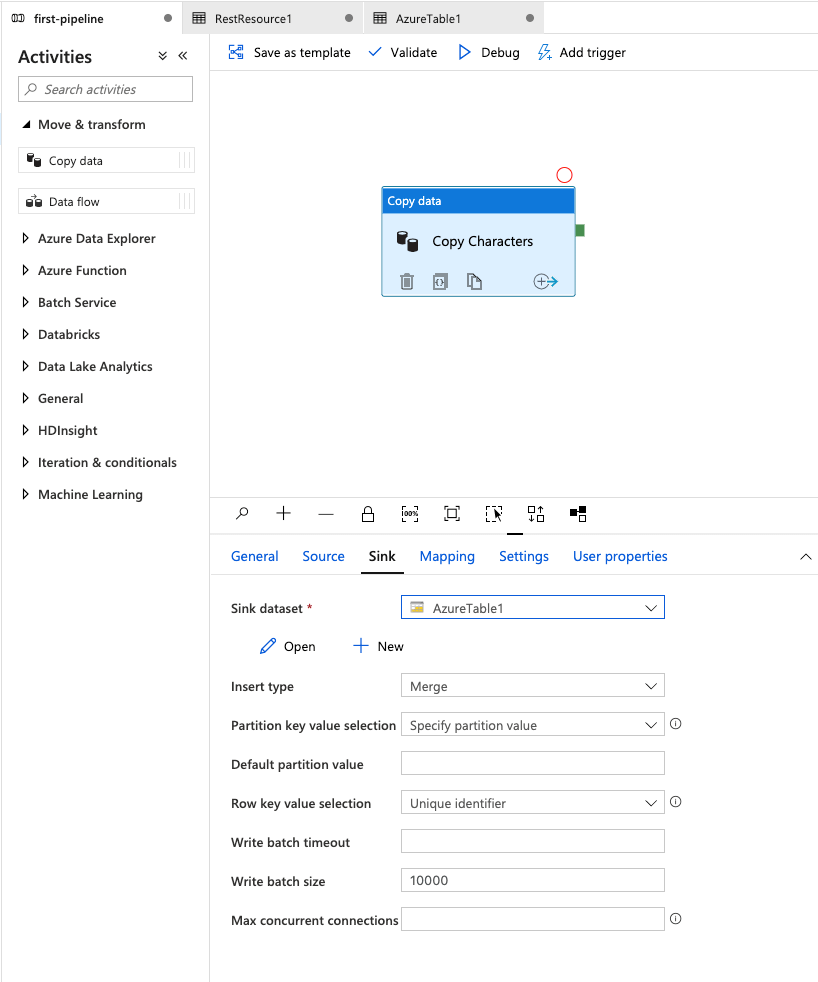
Our sink dataset is configured and ready for use.
For this tutorial, we'll leave everything else as-is. In a typical scenario, this is where you would configure how to handle duplicate data, partition keys, etc.
Section 5: Setup Mappings
Now that our source and target (Sink) is setup, we'll map our API data to our table where we'll store this data. Data mappings are easy thanks to the ability to discover and import our API schema.
To begin, click the tab labeled Mapping, then click the Import schemas button.
After a few seconds we should see the format our of API response appear.
Behind the scenes, ADF makes an HTTP request to our API and formats the response into a table layout for us to configure our mappings.
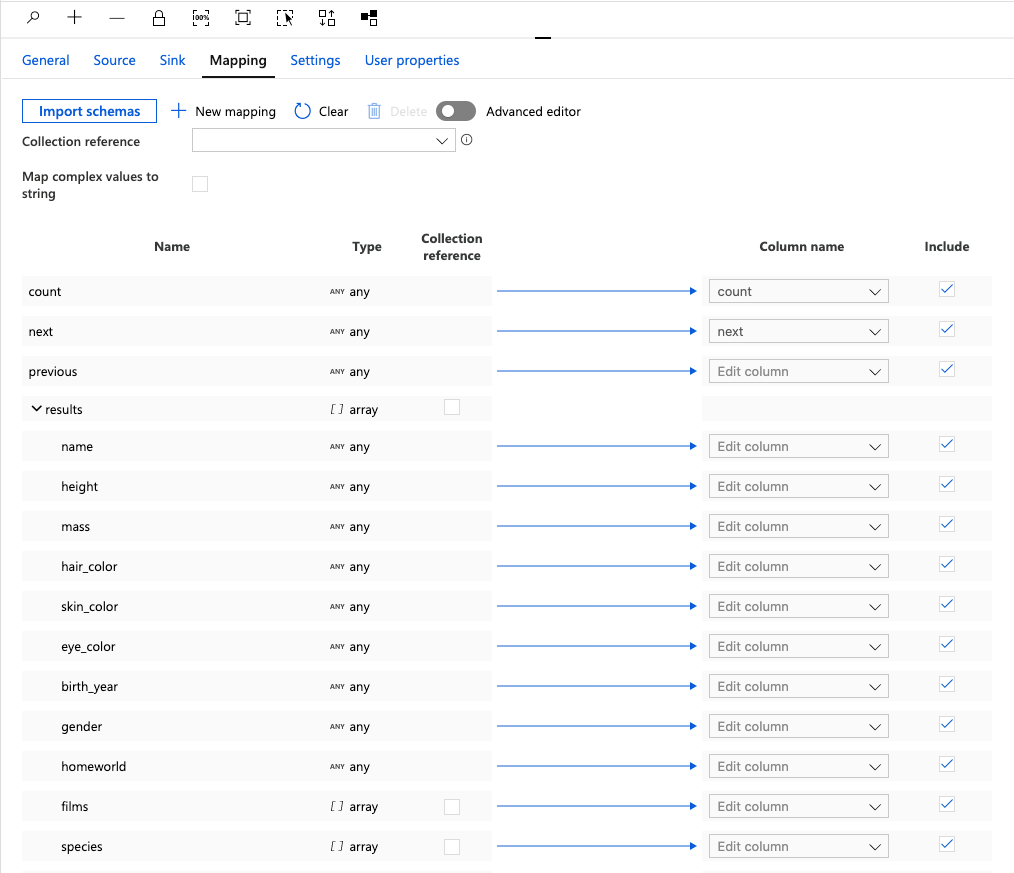
Notice the response layout includes properties such as count, next, previous and results. ADF intuitively knows that the results property is an array.
Next, we'll set our Collection reference to the array named results. To do this, either select it from the drop down list or check the box under the collection reference column.
Then we setup the Column names for the items we're mapping for import.
For this tutorial, we'll map the fields: name, height, mass and homeworld.
Uncheck the Include column for everything else.
Finally, type in the name we want our columns to be called (name, height, mass, homeworld.)

Section 6: Validate, Publish & Test
Now that we have completed setting up our source, sink, and mappings we are ready to validate, publish and test.
Validate
Let's validate everything before we move on to publishing.
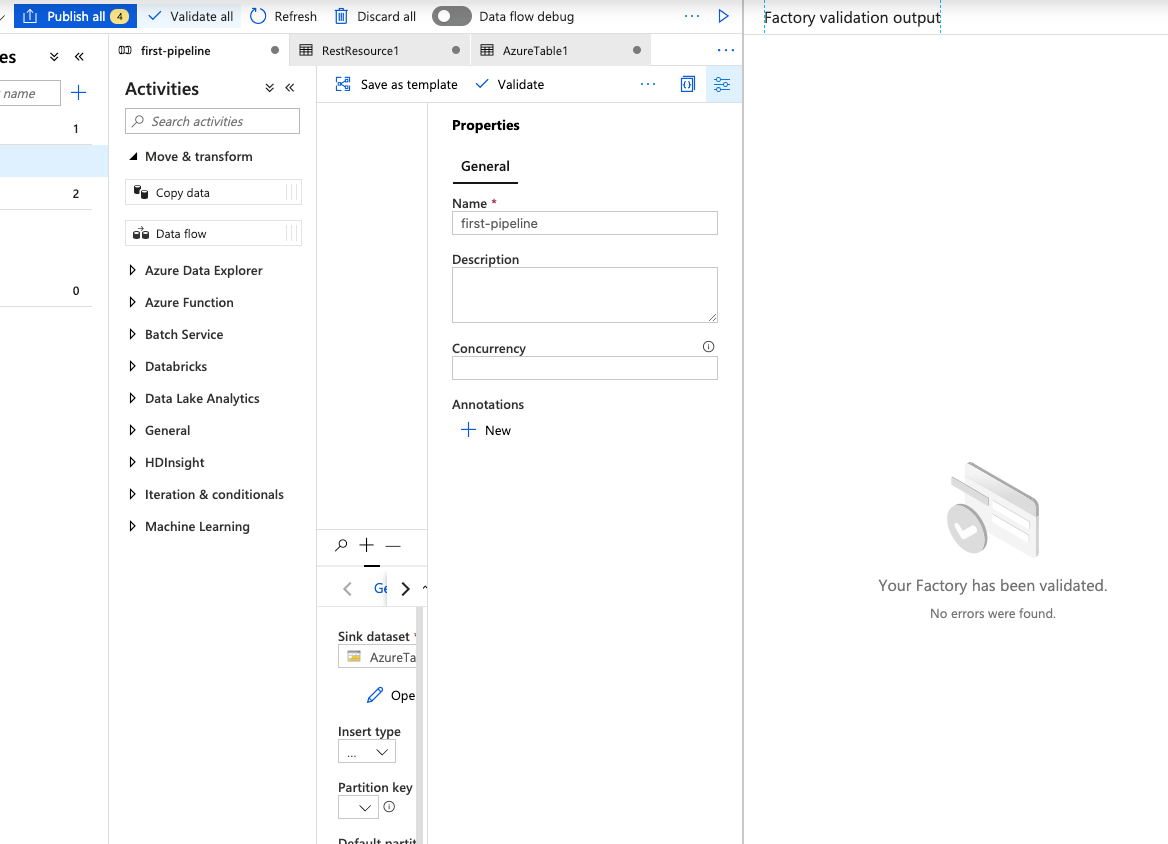
Click the Validate all button. A successful factory validation looks like Figure 6a.
Publish
Before trying out our new pipeline, we need to publish our changes.
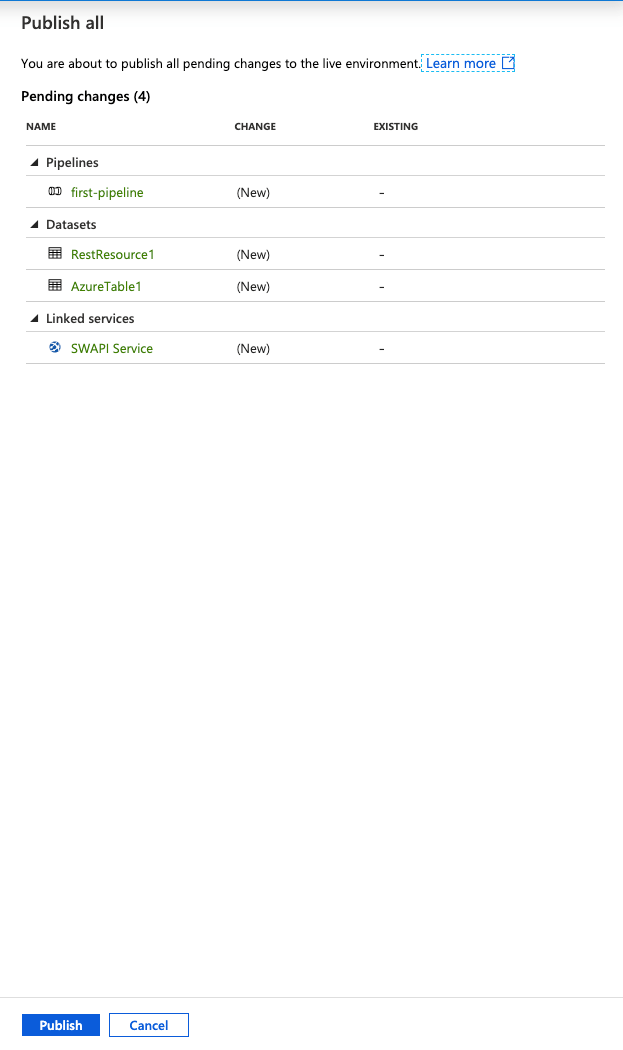
Click the Publish all button. A side panel will appear that shows us all the changes to be published.
Click Publish.
Test
Finally, we test that our new pipeline works. For this we'll use the debug feature.
Click the Debug button.
This will show the output tab and allow us to see the status of our pipeline run.
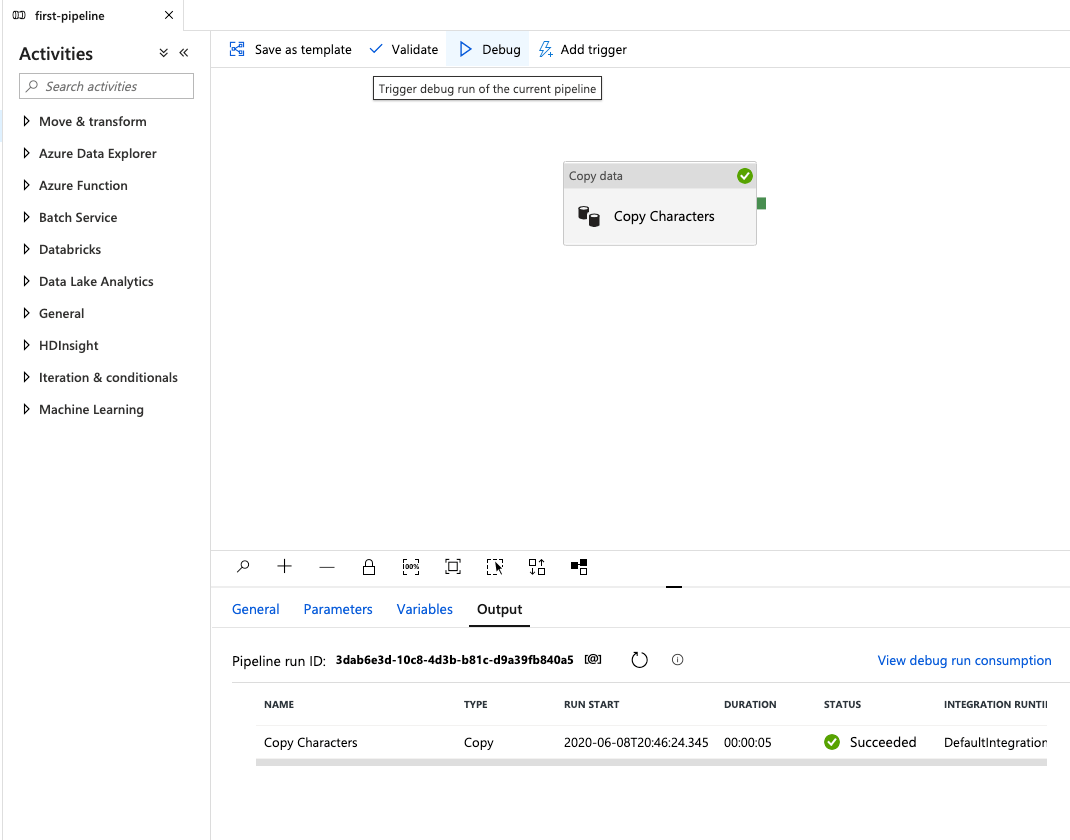
Once you see the pipeline has ran successfully you can dig deeper into the details of the run by hovering over the Copy Characters name.
The first icon is the input details and the second icon is the output details. You'll find overall details of the pipeline run in the third icon.
Click the Eyeglasses icon.
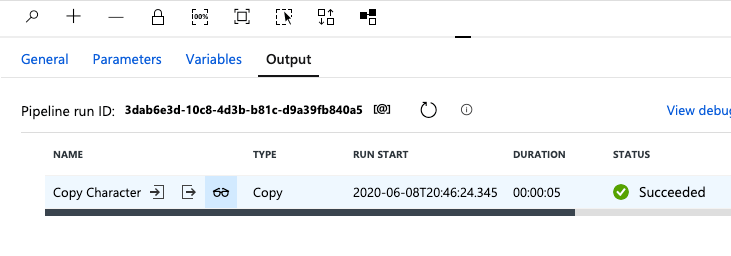
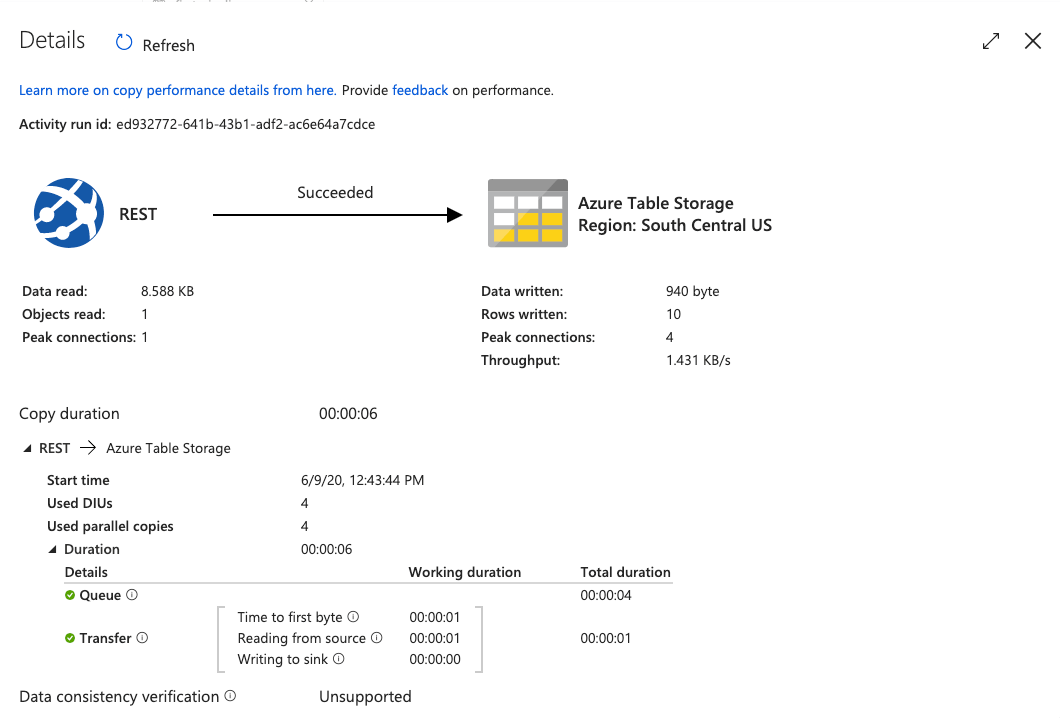
The Eyeglasses icon will show the overall details of the pipeline job that ran.
You can see from this overview (Figure 6e) we created 10 new rows in our table that ADF fetched from our API.
Section 7: Conclusion
And there you have it. We built our ADF pipeline with a task to copy data from an external API and save the results into Azure Table Storage.
To see our results inside of Azure Table Storage we can use the Azure Portal or our trusty Microsoft Azure Storage Explorer.
We'll use Storage Explorer to show the results of what was saved. Notice, the fields we mapped were imported for all 10 records (Figure 6f).
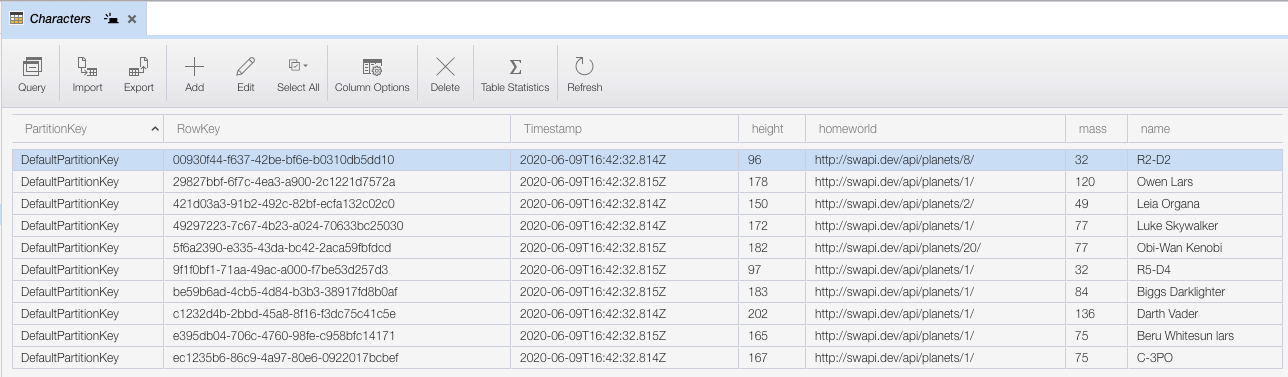
Not too shabby, right?
We hope you enjoyed this tutorial. Creating data integrations and handling data transformations can be a breeze using Azure Data Factory.
We only covered one task in this pipeline, however, once you learn to use ADF for integrations, you can stitch together powerful workflows.
And this is just the tip of the ice berg. We will explore other ways you can use Power Automate and ADF together to build powerful and easy to manage data integrations in follow-up tutorials.
If you like our content and want more tutorials, sign up for our monthly newsletter below. Or feel free to reach out to us on Twitter or via email with any questions.


Angular • React • Ionic • NestJS • C# • Azure • Next.js